 Save
Save Green tea always reminds me of that early spring morning when I attempted my first mini matcha smash cake on a whim. The light flooding through my kitchen windows made the bright green batter look extra inviting, and before I knew it, I was humming to the rhythm of my mixer. There's just something playful about making a tiny cake you’re free to smash and share—no pressure for perfection. I’d barely cooled the layers before the sweet scent of vanilla mingled with matcha drew everyone in. Every time I bake this, the kitchen feels just as lively and expectant, whether it’s for brunch or a surprise celebration.
I still laugh when I think of the quiet Sunday when my partner spontaneously invited friends over—suddenly, two mini matcha cakes were in the oven, and I just hoped the sprinkles I found at the back of the cupboard would be enough. We ended up crowding around the little cake, debating whether to slice or smash first. The frosting got a little smudged, but no one minded. That cake became the center of our laughter that day. It was gone before anyone could even refill their cups.
Ingredients
- All-purpose flour: Choosing a high-quality flour gives the cake its delicate crumb, and I’ve learned sifting is the secret to keeping things light.
- Granulated sugar: Not just for sweetness—it helps create a golden crust, and a little extra brings out the matcha.
- Baking powder: Don’t skip it—a little goes a long way in ensuring the cake rises evenly.
- Baking soda: Just a pinch provides balance, making the cake pleasantly tender.
- Salt: Learned the hard way that even a small pinch sharpens both the matcha and vanilla flavors.
- Matcha powder (culinary grade): Good matcha makes all the difference—sift it in for a smoother batter.
- Whole milk, room temperature: Room temp milk helps the batter come together without clumping.
- Large egg, room temperature: Beating this in smooths the batter and keeps the texture bouncy.
- Vegetable oil: Oil instead of butter yields a spongier, lighter crumb; neutral oils work best.
- Vanilla extract: Just half a teaspoon melts into the cake and ties all the flavors together.
- Unsalted butter, softened: Getting it truly soft (never melted) is key for the frosting’s creamy consistency.
- Powdered sugar, sifted: Lumps in the frosting never make pretty cakes—don’t skip sifting.
- Milk: Start with a tablespoon and adjust for your ideal frosting spreadability.
- Pinch of salt: A tiny bit tempers the sweetness, especially in the frosting.
- Sprinkles or fresh berries (optional): Even on a lazy day tossed berries or colorful sprinkles hide any imperfect icing jobs and make it feel special.
Tired of Takeout? 🥡
Get 10 meals you can make faster than delivery arrives. Seriously.
One email. No spam. Unsubscribe anytime.
Instructions
- Prep your pans and preheat:
- Line your tiny cake pans with parchment; a slick of butter in each corner does wonders and preheat your oven to 350°F for a jumpstart on fluffy layers.
- Mix the dry magic:
- Sift together flour, sugar, leaveners, salt, and matcha in a medium bowl, pausing to inhale the earthy matcha waft—don’t rush this part.
- Combine the wet ingredients:
- In a separate bowl, whisk milk, egg, oil, and vanilla until it looks like a mini latte—smooth and creamy is the goal.
- Unite wet and dry:
- Pour wet into dry and gently fold with a spatula; stop as soon as the streaks fade, resisting the urge to stir just a bit more.
- Pour and even out:
- Divide the batter and coax it to the edges—tilting the pans is oddly satisfying.
- Bake to perfection:
- Slide the pans into the oven and listen for the faint sweet aroma around 15 minutes; check with a toothpick at 18.
- Cooling down:
- Let the cakes rest in their pans for five minutes—long enough for a coffee refill—then transfer carefully to a wire rack.
- Whip up the frosting:
- Beat the butter until fluffy, then gradually add powdered sugar; keep going until you have a cloud-like texture, finishing with the milk, vanilla, and that pinch of salt.
- Assemble and frost:
- Layer with frosting, stack, and spread a thin coat all around; perfection is overrated—smears and swirls give character.
- Decorate and celebrate:
- Add sprinkles or berries as the urge strikes, then set your mini cake center stage for slicing or smashing—no wrong way here.
 Save
Save 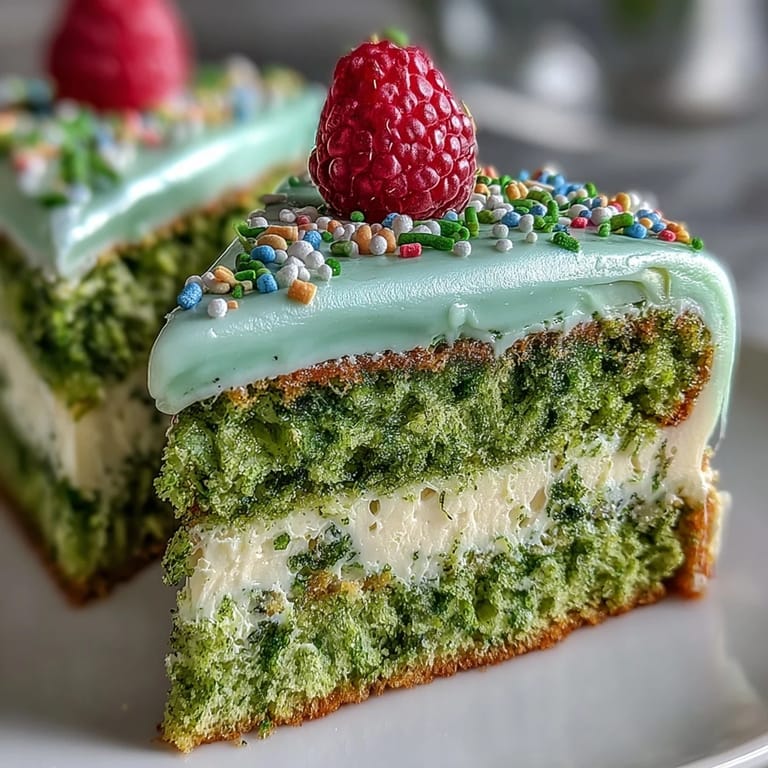 Save
Save During one memorable brunch, my niece was the designated cake smasher—her giggles as frosting flew somehow made the matcha taste even sweeter. Somehow, even the tiniest cakes have a knack for creating larger-than-life joy around the table.
What Makes Mini Smash Cakes So Fun?
Mini smash cakes break the invisible rule that cakes must be big to be special. There’s a quiet thrill in the tiny, stackable layers—more space for frosting and just enough surface for your wildest sprinkle patterns. They invite just the right amount of chaos for a grown-up brunch. And no two ever look the same, which honestly just adds to the conversation. There’s never any pressure to keep it pristine.
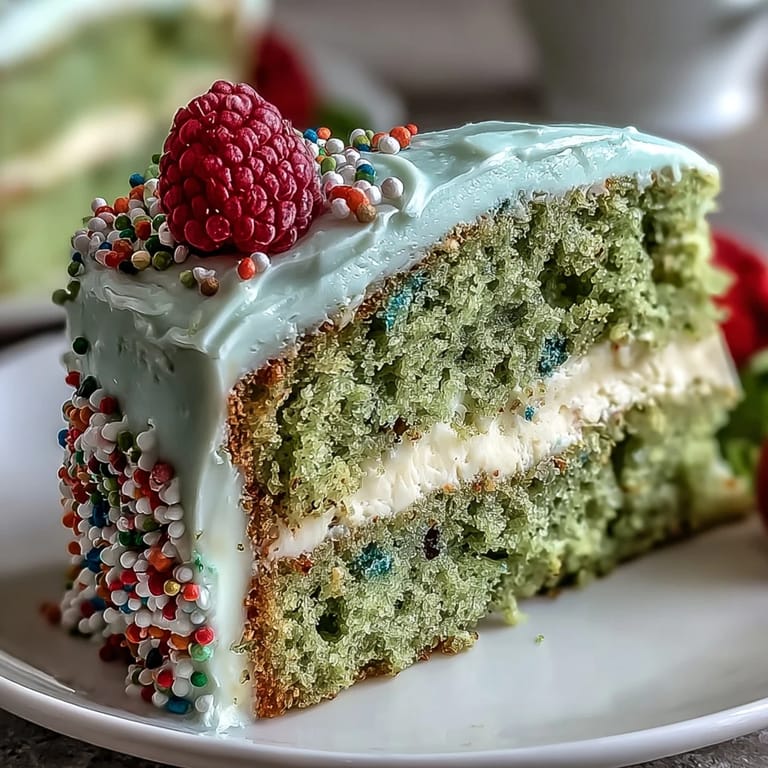
Getting That Perfect Green Shade
After a handful of tries, I realized the biggest secret is culinary-grade matcha that’s been stored away from light. Sometimes, I add a smidge extra for a real emerald finish. Sifting is non-negotiable; it dissolves clumps and dials up the color’s vibrancy. If you love drama, top with berries that pop against the cake’s mellow green. The contrast is irresistible on any brunch table.
Brunch Moments: Serving and Smashing
I’ve found there’s a mood shift when you bring out a cake meant to be smashed instead of sliced; it sets a playful tone no matter who’s gathered. Frosting sticking to fingers or laughs over slightly lopsided layers become part of the fun. These cakes always end up at the center of photos and memories—just as much about the experience as the taste.
- Don’t stress about perfect layers; it’s all about the smash at the end.
- Let everyone take a turn decorating, kids or adults alike.
- Cakes are best eaten the day they’re made—freshness is unbeatable.
 Save
Save 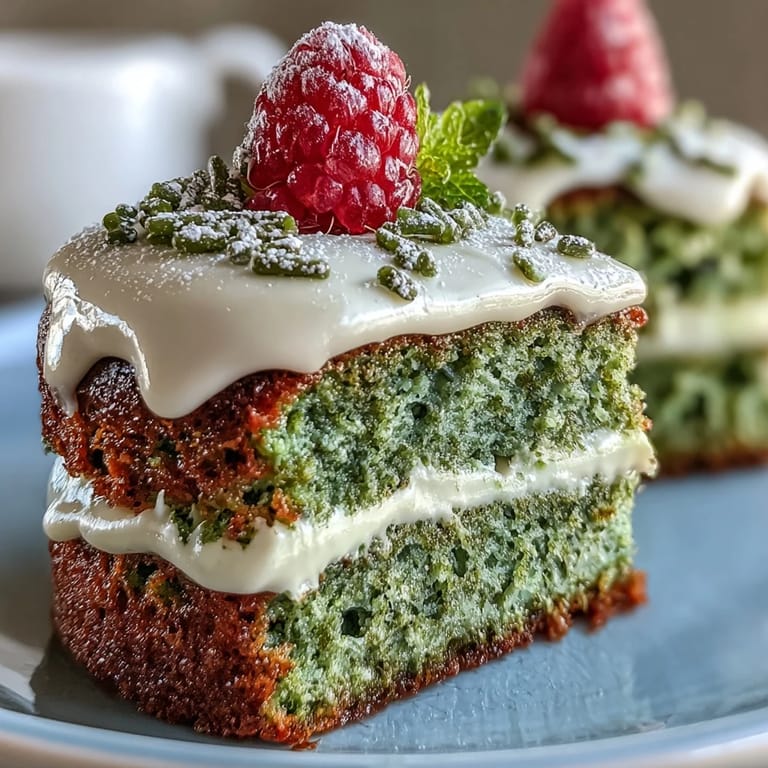 Save
Save Mini matcha smash cakes might seem fancy, but making them is pure joy, and sharing them is even better. Here’s to all the little cakes that make big memories.
Recipe FAQs
- → How long should I bake the mini pans?
Bake the 4-inch pans for 15–20 minutes. Check with a toothpick inserted in the center—it should come out clean or with a few moist crumbs. Smaller pans can shorten bake time, so start checking at 12 minutes.
- → How can I intensify the matcha flavor?
Use culinary or a slightly higher-grade matcha and increase the powder by 1–2 teaspoons to taste. Balance bitterness by keeping sugar levels or adding a touch more vanilla in the batter or frosting.
- → What are good dairy-free swaps?
Swap whole milk for plant-based milk (oat or soy work well) and use a vegan butter for the frosting. Texture may be slightly different—chill the frosting briefly if it feels too loose before assembling.
- → Why use two 4-inch pans?
Two 4-inch pans produce thin, even layers that stack neatly for a smash-style presentation. If you only have one pan, bake in batches or halve the batter and adjust bake time accordingly.
- → How do I get clean layers and a smooth finish?
Level the batter in each pan and avoid overmixing. Cool completely before stacking. Apply a thin crumb coat of frosting, chill briefly, then add a final smooth layer with an offset spatula for a neat finish.
- → How should I store and serve the cake?
Store covered in the refrigerator for up to 2 days; best enjoyed the same day for freshness. Bring to room temperature for 20–30 minutes before serving to soften the frosting and enhance flavor.