Save
Save My kitchen exploded in color the first time I attempted this cake, and honestly, it was glorious chaos. I'd been scrolling through party ideas when my daughter casually mentioned wanting a cake that surprised you when you cut into it—something with hidden candy inside. That offhand comment sent me down a rabbit hole of rainbow layers and piñata dreams, and three hours later, I had flour in my hair, six bowls of brightly colored batter, and absolutely no regrets. This cake became my answer to every celebration that needed a little extra magic, especially the ones that called for margaritas and laughter.
I baked this for my neighbor's Cinco de Mayo block party, and watching a table of forty people lean in to catch the candy scattered across their plates reminded me why I love cooking for crowds. Someone immediately asked for the recipe, another person started texting photos to their family group chat, and the empty cake box sat there as proof that this is the kind of dessert that gets remembered. That afternoon, with the sun beating down and mariachi music drifting across the yard, felt like pure joy translated into buttercream.
Ingredients
- All-purpose flour (3 cups): The foundation of your tender crumb; make sure it's not packed down when you measure or your cake gets dense and tight.
- Baking powder and baking soda (2½ tsp and ½ tsp): These lift and lighten; they're what gives you those soft, cloud-like layers that stack beautifully without crumbling.
- Salt (½ tsp): Doesn't make things taste salty—it actually heightens the vanilla and sweetness while balancing everything.
- Unsalted butter (1 cup): Room temperature is non-negotiable here because cold butter won't cream properly and you'll lose that fluffy texture that makes this cake special.
- Granulated sugar (2 cups): The creaming process with butter is where magic happens; don't rush those three minutes of beating.
- Large eggs (4): Room temperature eggs emulsify smoothly into the batter; cold ones cause lumps and uneven mixing.
- Vanilla extract (2 tsp): Use real vanilla if you can—it adds warmth that pure almond or imitation extracts simply can't match.
- Whole milk (1¼ cups): Room temperature so it doesn't shock the batter; it creates richness and tender crumb structure.
- Gel food coloring (red, orange, yellow, green, blue, purple): Gel holds color better than liquid and won't thin out your batter like water-based versions do.
- Assorted small candies (1½ cups): This is where personality lives—use what you love, but skip anything too sticky or hard that might crack teeth.
- Unsalted butter for frosting (1½ cups): Softened means it should feel almost like the texture of whipped cream when you press it.
- Powdered sugar (5 cups): Sift it first to avoid lumpy frosting that feels gritty on your tongue.
Tired of Takeout? 🥡
Get 10 meals you can make faster than delivery arrives. Seriously.
One email. No spam. Unsubscribe anytime.
Instructions
- Heat your oven and prep your pans:
- Set the oven to 350°F and grease three 8-inch round pans with butter or cooking spray, then line the bottoms with parchment paper so your layers slide out without sticking. This step takes two minutes but saves you from stuck, broken cakes.
- Combine your dry ingredients:
- Whisk flour, baking powder, baking soda, and salt together in a medium bowl until there are no lumps or streaks. This distributes the leavening evenly so your cake rises uniformly.
- Cream butter and sugar:
- Beat softened butter with sugar for about three full minutes until it's pale, fluffy, and almost resembles frosting—this is where you incorporate air that makes the cake light. Don't skip this step or rush it; texture depends on this foundation.
- Add eggs one at a time:
- Drop in each egg and beat well for about a minute before adding the next one; this helps them emulsify into the batter rather than sitting in pools. You should see the mixture become smooth and slightly lighter with each egg.
- Mix in the vanilla:
- Pour in vanilla extract and beat until combined; the mixture should smell incredible at this point.
- Alternate dry and wet:
- Add a third of your flour mixture, beat gently for about ten seconds, then add a third of the milk, mix briefly, repeat with another third of flour, then milk, and finish with the last of the flour. Always begin and end with flour to prevent overworking the batter and keep your cake tender.
- Divide and color your batters:
- Pour the base batter into six bowls and add a different gel color to each—red, orange, yellow, green, blue, and purple—stirring just until the color is evenly distributed. The gel will be highly concentrated, so go slowly or you'll end up with colors that are too dark.
- Bake your layers:
- Pour each colored batter into a prepared pan (if you only have three pans, you'll bake in two batches, keeping the remaining batters covered at room temperature) and bake for 15 to 18 minutes until a toothpick in the center comes out clean. The layers should spring back slightly when you touch the top.
- Cool with patience:
- Leave each layer in its pan for ten minutes so it firms up, then turn it out onto a wire rack to cool completely; this prevents it from falling apart when you stack it.
- Cut the center cavities:
- Once all layers are cool, use a 3-inch round cutter to punch out the center of four layers, leaving the top and bottom layers whole. You're creating a hollow space to hold your surprise candy.
- Make your frosting:
- Beat softened butter until it's creamy and pale, about two minutes, then gradually add sifted powdered sugar, milk, vanilla, and salt, beating until fluffy and spreadable. Taste it and adjust vanilla if needed—good frosting should taste like butter and vanilla in perfect harmony.
- Build your masterpiece:
- Place the purple (bottom) whole layer on your serving plate, spread a thin layer of frosting on top, then stack the first layer with the cut-out center on top and frost lightly. Repeat this pattern with each of the four cut-out layers, alternating your colors as you go.
- Fill with candy:
- Once all the cut-out layers are stacked, pour your assorted candies into the center cavity until it's overflowing; this is the magical moment where you're creating the surprise.
- Cap it off:
- Place the final whole layer (your top) over the candy-filled cavity, pressing gently so it sits flush; this seals in the surprise and keeps candies from sliding out.
- Frost the outside:
- Generously frost the entire outside of the cake and the top with your remaining frosting, using an offset spatula to smooth it or create swoops and patterns. Decorate with colored frosting, sprinkles, or festive toppers if you want extra celebration on the outside.
- Chill before serving:
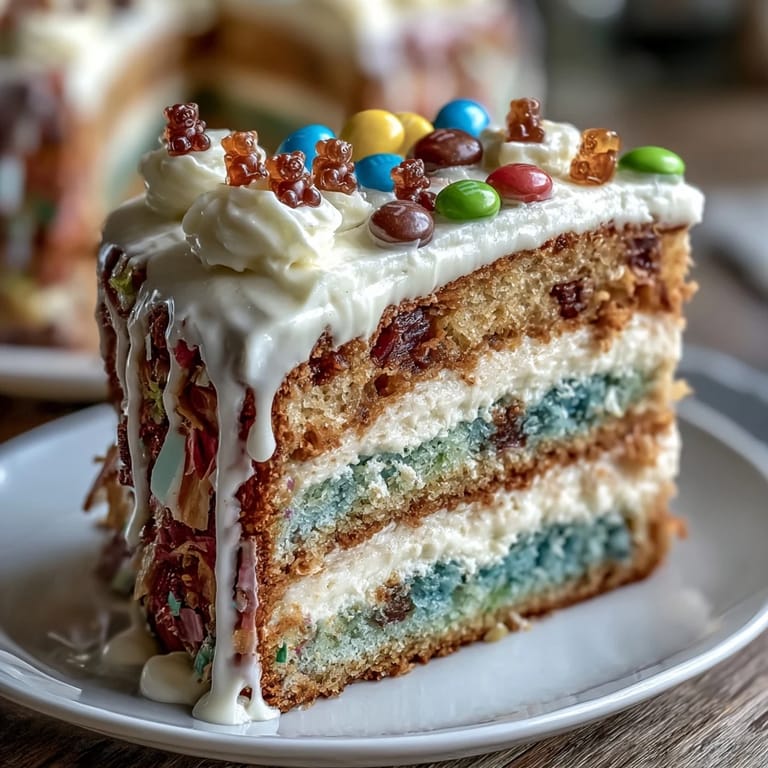
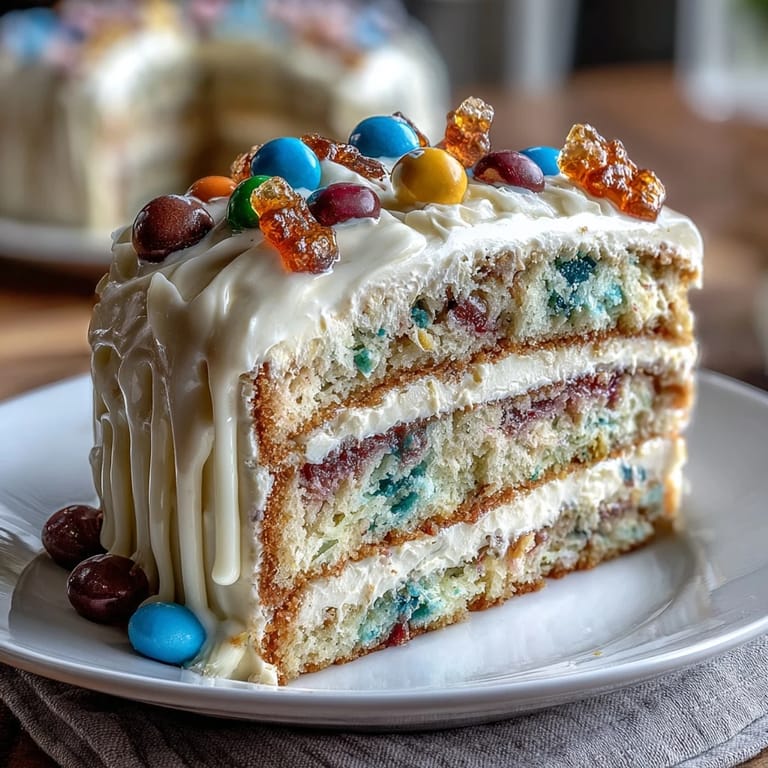
- Refrigerate for at least thirty minutes so the frosting sets and the cake becomes easier to slice cleanly without the layers shifting. When you cut into it, you'll see those beautiful rainbow layers and the scattered candy—this is when people lose their minds.
 Save
Save My favorite memory from making this cake happened when my son sneaked into the kitchen and caught me mid-assembly, candies spilled across the counter in a rainbow avalanche. Instead of scolding him, I handed him the scoop and said, "Help me fill this thing," and suddenly we were creating something together, his little hands carefully placing gummy bears exactly where he thought they should go. When we sliced into that cake at his birthday party, he pointed at his perfectly positioned gummy bear arrangement and told everyone, "I helped make the surprise inside"—and I realized that's really what this cake is about.
The Color Mixing Magic
Getting those six distinct, vibrant colors requires a light hand and patience with the gel food coloring. I used to dump in entire bottles and end up with muddy, over-saturated colors that looked bruised rather than festive. The secret is starting with a tiny drop on a toothpick, stirring, and adding more incrementally—gel is concentrated enough that a little goes a long way. After a few batches, I learned that if you mix colors in a specific order (red first, then orange, yellow, green, blue, purple), you can even reuse mixing bowls between batches, rinsing quickly between them.
Storing and Making Ahead
This cake actually rewards being made a day in advance because the layers settle and compress slightly, making them easier to stack and slice. I've baked and cooled the layers, wrapped them individually in plastic wrap, and kept them at room temperature overnight with no problems. The frosting can be made up to three days ahead and stored in an airtight container in the fridge; just let it come to room temperature and give it a quick stir before using.
Variations and Personal Touches
Once you understand the structure of this cake, you can play with it endlessly. I've made it with chocolate layers, vanilla layers, even mixed in crushed freeze-dried strawberries for subtle flavor. The candy inside can change with the season—chocolate chips for winter, conversation hearts for Valentine's Day, mini pretzels mixed with chocolate for a sweet-salty vibe. Your cake, your rules.
- For a gluten-free version, swap in a 1:1 gluten-free flour blend and the cake bakes exactly the same with no texture compromise.
- If you're nervous about the coloring, remember that pastel colors are just as stunning as bright ones and often photograph even better.
- Avoid hard candies like lollipops or jaw breakers that could crack teeth; stick to soft candies, chocolate, and gummies.
 Save
Save This cake is pure joy in layer form—colorful, surprising, and absolutely showstopping. Make it once, and you'll understand why it's become my go-to celebration cake for anyone who deserves a moment of magic on their plate.
Recipe FAQs
- → How do I achieve the bright colors in the layers?
Use gel food coloring for vibrant, intense hues without altering the batter's consistency.
- → What candy works best for the piñata filling?
Choose small, non-melting candies like mini M&Ms, sprinkles, or gummy bears to maintain the surprise inside.
- → Can I prepare this cake ahead of time?
Yes, assembling and chilling the cake for at least 30 minutes ensures clean slices and helps the frosting set.
- → What should I use if I want a gluten-free version?
Substitute all-purpose flour with a 1:1 gluten-free flour blend to maintain texture and structure.
- → How can I avoid the layers sticking to the pans?
Grease and line each 8-inch round pan with parchment paper to ensure easy release after baking.
- → Is there a recommended way to stack the layers with candy inside?
Cut a 3-inch diameter hole in the center of four layers, stack them with frosting between, pour the candy into the cavity, then cover with whole layers on top and bottom to hold everything securely.