 Save
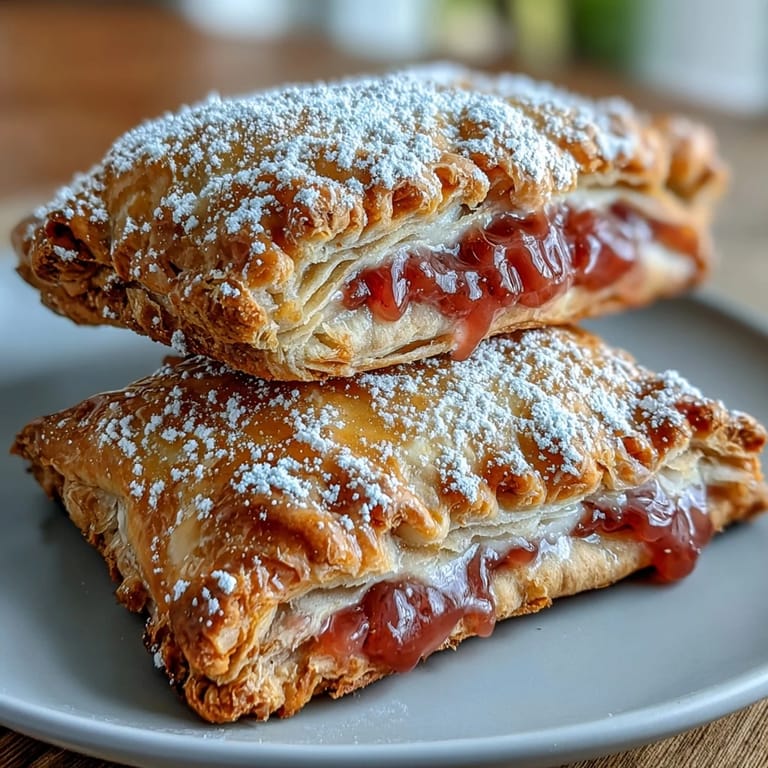
Save My neighbor brought over a box of homemade guava pastries one afternoon, and I couldn't stop thinking about them for weeks. The combination of that tart-sweet guava with creamy cheese wrapped in buttery pastry felt like a revelation, so I decided to recreate them in my own kitchen. What started as a weekend experiment became something I now make whenever I want to feel a little fancy while eating breakfast in my pajamas. The first time I pulled a batch from the oven and saw that golden glaze catch the morning light, I knew this recipe was a keeper.
I made these for my book club last month, and watching everyone's faces light up when they bit into that first warm pop tart made the thirty minutes of prep completely worth it. Someone asked if I'd bought them from a fancy bakery, and I got to deliver that satisfying answer: homemade. That moment reinforced what I've learned about cooking—people remember how food makes them feel more than they remember whether it came from a box or a bowl.
Ingredients
- All-purpose flour (2 1/4 cups): This is your foundation, so use fresh flour that hasn't been sitting in your pantry for a year—stale flour won't give you that flaky texture you're after.
- Unsalted butter (1 cup, cold and cubed): Cold butter is non-negotiable here; it's what creates those delicate flaky layers, so keep it in the freezer until the last possible moment.
- Ice-cold water (1/3 cup): Temperature matters—warm water will make the dough tough, so use water straight from the fridge or even toss in an ice cube.
- Guava paste or jam (3/4 cup): Look for the thick, concentrated stuff rather than runny jam, as it holds its shape better and delivers more guava punch.
- Cream cheese (4 oz, softened): Letting it sit on the counter for fifteen minutes before mixing prevents lumps and creates a smooth, spreadable filling.
- Powdered sugar (for filling and glaze): Sift it if you have the patience—it dissolves more smoothly and prevents grittiness in your glaze.
- Egg wash (1 large egg): This gives you that gorgeous golden shine, so don't skip it, and make sure to brush it on just before baking, not before chilling.
Tired of Takeout? 🥡
Get 10 meals you can make faster than delivery arrives. Seriously.
One email. No spam. Unsubscribe anytime.
Instructions
- Make the pastry base:
- Whisk together your flour, sugar, and salt in a large bowl, then add your cold butter cubes. Using a pastry blender or your fingertips, work the butter into the flour until it looks like coarse breadcrumbs—this is where patience pays off, as the texture of your pastry depends on keeping the butter pieces distinct rather than fully incorporating them.
- Bring the dough together:
- Drizzle in your ice water gradually, stirring gently with a fork until the dough just barely comes together. You'll know it's ready when you can gather it into a rough ball without any dry flour remaining in the bottom of the bowl.
- Chill and rest:
- Divide your dough in half, flatten each piece into a disk, wrap them in plastic wrap, and refrigerate for at least thirty minutes. This rest is crucial because it lets the gluten relax and prevents shrinkage when you roll and cut the pastry.
- Prepare the filling:
- While your dough chills, beat your softened cream cheese with powdered sugar and vanilla extract until it's completely smooth and creamy. A quick thirty-second mixer pulse works better than hand-stirring, which can take forever and leave tiny lumps.
- Roll and cut:
- On a lightly floured surface, roll out one dough disk to about 1/8-inch thickness, then cut it into eight rectangles roughly 3 by 4 inches. If your dough starts sticking, give it a quick chill in the freezer for five minutes—it'll firm right back up.
- Fill with care:
- Place about a teaspoon of guava paste and a teaspoon of cream cheese mixture in the center of four rectangles, leaving a clear border around the edges. This border is your seal, so don't skimp on it or you'll have filling leaking out during baking.
- Seal the edges:
- Brush the borders of each filled rectangle with beaten egg, then top each one with an unfilled rectangle and press firmly around the edges. Use a fork to crimp the edges all the way around, which not only seals them but creates those classic pop tart ridges.
- Final chill before baking:
- Transfer your sealed pop tarts to a parchment-lined baking sheet and chill for ten minutes. This extra rest helps prevent them from shrinking and ensures even baking.
- Bake to golden perfection:
- Preheat your oven to 375°F, brush the tops with egg wash, and prick each pop tart a few times with a fork to let steam escape. Bake for twenty-two to twenty-five minutes until they're deeply golden brown, rotating the sheet halfway through if your oven runs hot.
- Cool completely:
- Let them cool on the baking sheet for at least five minutes before transferring to a wire rack. I learned the hard way that glazing warm pop tarts just causes the glaze to melt off, so patience is your friend here.
- Glaze with style:
- Whisk together powdered sugar, milk, and vanilla until you reach a pourable consistency, adding a few drops of pink or red food coloring if you want that nostalgic pop tart look. Once your pop tarts are completely cool, drizzle or spread the glaze across the tops and let it set before serving.
 Save
Save The real magic happened when my kids came home from school and caught the aroma of baking pastry mixed with guava and vanilla—they abandoned their backpacks by the door and camped out in the kitchen until I let them have one. Watching them dunk a pop tart into milk and take that first bite, I realized this recipe had become more than just a nostalgic breakfast item for me; it was now creating new memories with the people I love most.
Why Homemade Beats the Box
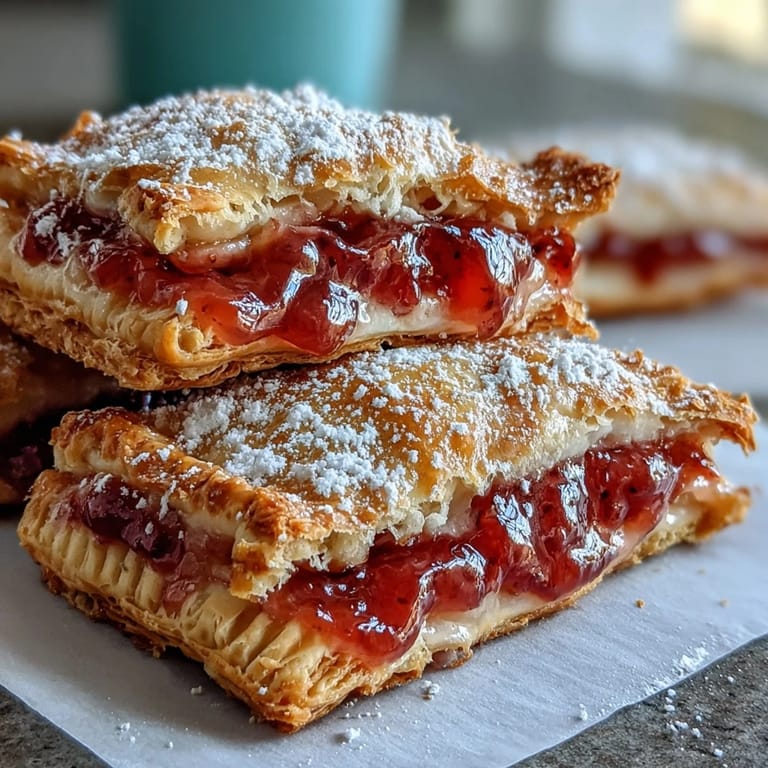
Store-bought pop tarts are convenient, sure, but they can't compete with a pastry that actually shatters when you bite into it. Making your own means you get that butter-laminated flakiness that comes from respecting the process, plus you can taste actual guava and cream cheese instead of approximations of those flavors. The satisfaction of pulling golden pastries from your own oven is something no box can offer.
Flavor Combinations Worth Trying
Once you nail the guava cheese version, the pastry technique opens up endless possibilities. Strawberry jam with a touch of lemon zest, apricot with a hint of almond extract, or even mango with a whisper of chili powder all work beautifully within this same structure. I've experimented with swapping the cream cheese for mascarpone to see what happens, and it added this subtle richness that felt almost decadent.
Storage and Gifting Ideas
These keep beautifully in an airtight container for up to three days, making them perfect for meal prep or bringing to a friend's house as a gift. I've even frozen unbaked pop tarts successfully, which means you can assemble them on Sunday and bake fresh ones throughout the week for that just-made feeling. Here's what I've learned makes them gift-ready:
- Stack them between parchment paper layers to prevent sticking and keep the glaze from smudging.
- Pack them in a pretty box or tin with a handwritten note about how to warm them up if needed.
- Make a double batch and freeze the extras so you always have homemade pop tarts waiting in your freezer for unexpected breakfast emergencies.
 Save
Save Every time I make these pop tarts, I'm reminded that sometimes the best things come from taking something familiar and making it your own. These are the kind of pastries that remind you why home cooking matters.
Recipe FAQs
- → Can I use fresh guava instead of paste?
Fresh guava lacks the concentrated sweetness and thick consistency needed for this filling. Guava paste or thick jam provides the right texture and intense flavor that pairs perfectly with cream cheese.
- → How do I prevent the filling from leaking during baking?
Ensure edges are sealed firmly with a fork and chill the assembled pastries for 10 minutes before baking. This helps the dough firm up and maintain its shape in the oven.
- → Can I make the dough ahead of time?
Yes, the dough can be prepared up to 2 days in advance and stored wrapped in the refrigerator. You can also freeze the dough disks for up to 3 months and thaw overnight before using.
- → What other fruit fillings work well?
Strawberry, apricot, or pineapple jam make excellent substitutes. The key is using a thick, concentrated fruit spread that won't make the pastry soggy during baking.
- → How should I store these pastries?
Keep in an airtight container at room temperature for up to 3 days. For longer storage, freeze unglazed pastries for up to 2 months and thaw at room temperature before glazing.
- → Can I bake these without the glaze?
Absolutely. The pastries are delicious on their own, though the glaze adds extra sweetness and a professional finish. You can also brush with simple syrup while warm for a glossy look.